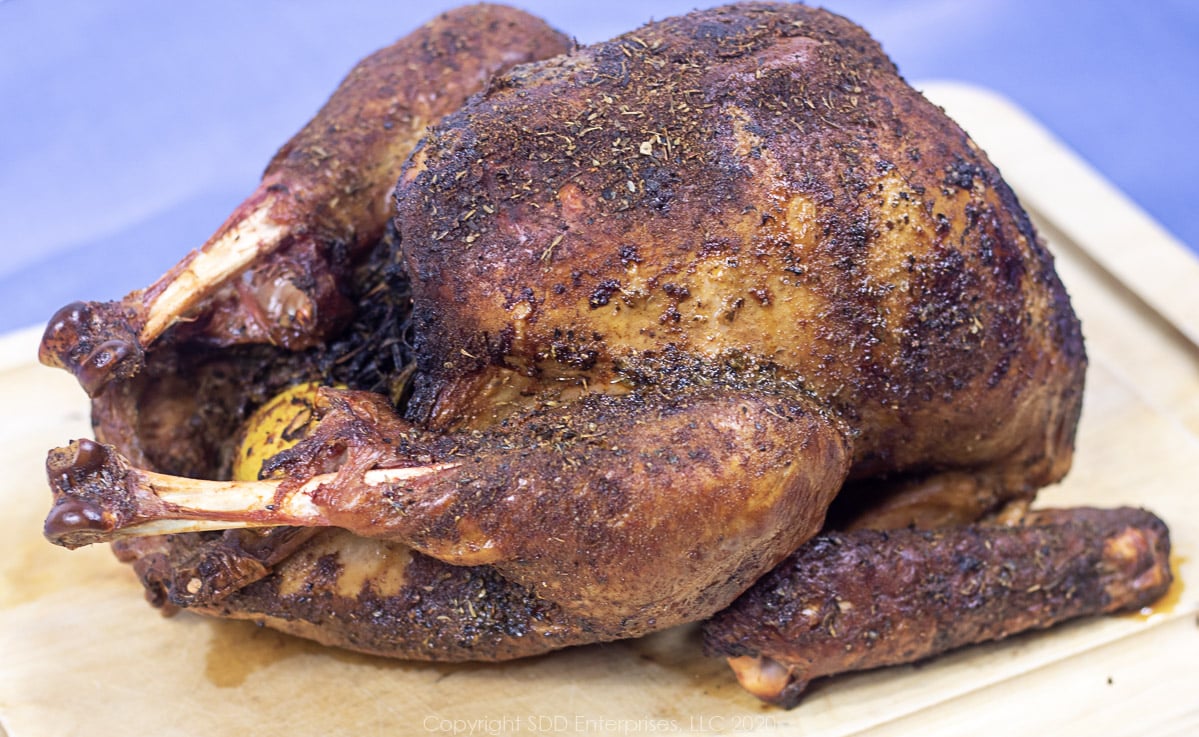
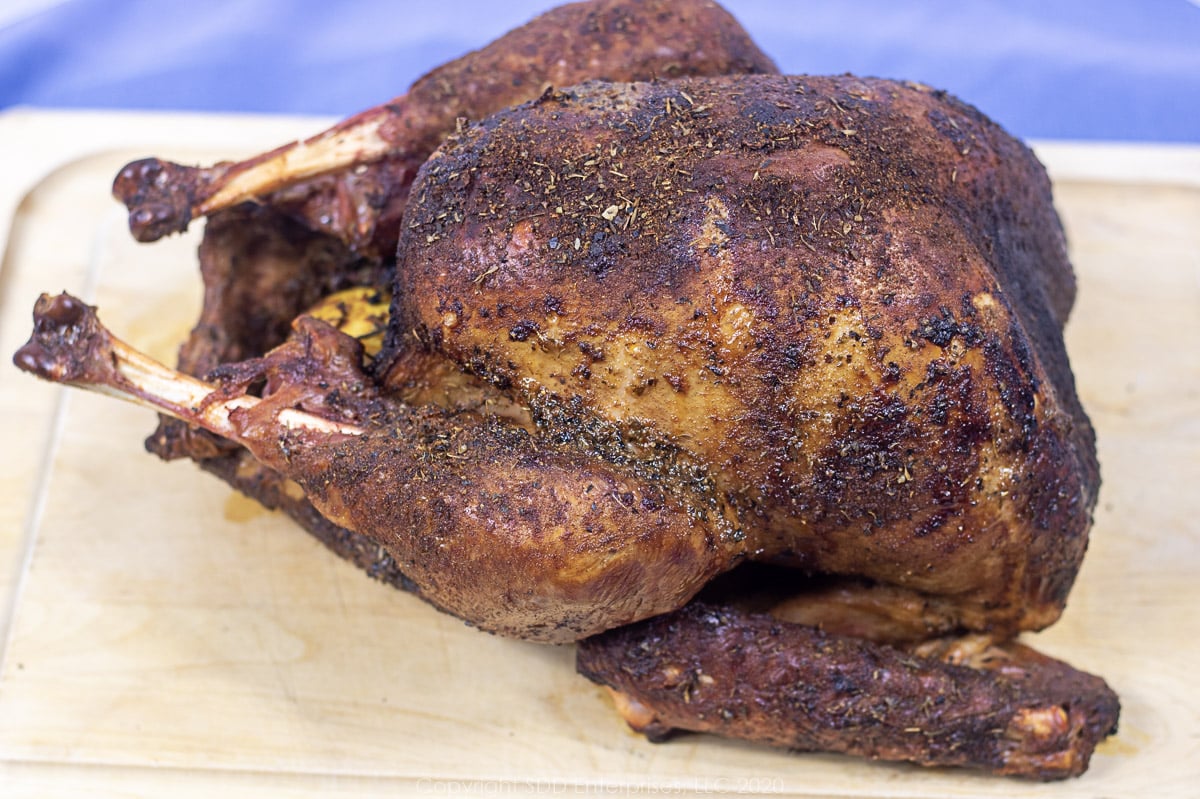
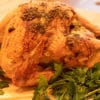
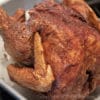
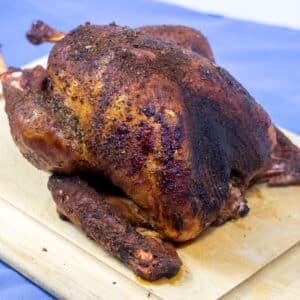
You want some oohs and aahs when you place the holiday Turkey on the table. There's a bit of ceremony involved in the presentation and the carving but the real joy starts with that first taste. Sweet Daddy D's Smoked Turkey is dry brined and rested so the skin is crisp and the meat is moist. Add a touch of smokey flavor for a turkey that will be memorable for your guests. Don't tell anyone, but it ain't as hard as it looks to turn out a wonderfully moist bird for all to enjoy.
This post is not sponsored, but you will find affiliate links on this page. As an Amazon Associate, I earn from qualifying purchases. The price you pay as a consumer does not change, but I may make a small commission based on your purchase.
If you want to just skip to the recipe, click the "Jump To Recipe" button above or the Recipe link below and you'll go right there without having to scroll through my article.
Jump to:
Why Dry Brine?
Our goal is to produce a juicy, well-cooked turkey with crispy skin. It starts with a dry brine process to help promote moisture with the use of salt. It's high science, but any couyon can do it. Most brining processes involve marinating the turkey in a salty water solution, but with a dry brine, a dry mixture of salt and seasonings do all the work. The salt draws moisture to the surface of the turkey, both from the meat and from the atmosphere. That moisture melts the salt in the brine which is then absorbed, along with some of the herbs and spices, back into the bird. Ample time is needed for this process to be effective; no less than an hour but the longer the better. I usually dry brine for at least an hour per pound. Don't worry that you'll be left with a salty turkey because we will rinse off the excess brine when we are done. The crispy skin part is achieved by doing a naked rest. No, you don't have to get naked (that part is totally optional). After we rinse the dry brine off, it will go in the refrigerator to dry out the skin a little. As such, after spending some time in the smoker, the skin will be nicely browned and crisp.
Here's What You Need

Equipment
Here is some of the equipment I used to prepare this recipe:
Cambro prep bowls, Glass prep bowls, Cutting boards, Chef's Knife, Measuring cups, Measuring spoons, Brining bag, thermometer, instant-read thermometer, Prep Trays
Lagniappe-Some of my Thermoworks Tools
I am a participant in ThermoWork's Affiliate Program, so I will receive a small commission on any sale through my website links.

Measure twice, cut once. You have a lot of time and effort invested in cooking, so make sure to use tools that are reliable and of high quality. That's particularly important when you are tracking and measuring temperature and time. There can be a fine line between perfectly cooked and horribly under or overcooked. That's why I have relied on products from Thermoworks for years to give me accurate information I can count on. I have found their products to be high-quality and durable and their customer service to be second to none. Check out the Thermoworks website...you won't believe the range of products they have for measuring just about everything.
Here's What You Do
First...you have a beer. This process takes some time and will require a bit of planning. The good news is that you'll have a chance to consume a few beers during the process. Start with one beer while you read the recipe and think through the process. Do you have to thaw your turkey? Do you have everything that you need for your smoker? What sort of wood will you use for smoke flavor? The actual preparation should start the day before you smoke it, giving you time for the brine and naked rest. (It may start even earlier if you have to defrost your bird.) Make sure you have all the ingredients and you know what you're going to do with them before you start. It's really pretty simple if you prepare, but there are some moving parts. I think I'll have another beer.
Prepare the brine and rubs
Mix all the ingredients for the dry brine and the dry rub and place them in separate airtight containers. Gather all the ingredients for the injection (wet rub). Even though you won't mix that until right before you'll use it, you need to give it some thought. If you decide not to inject you can rub the butter solution all over the turkey. Nothing wrong with that. We'll talk more about the injection in the Wet Rub/Injection section below. Next, gather the items you will aromatics to stuff in the cavity, tie the herbs together in a bouquet garni. Place everything in a large prep bowl and stick it in the fridge. You won't need them for a while either so you can wait to slice the fruit and vegetables but don't wait until the last minute and find out you don't have something you want. Besides, you'll have a lot going on getting the bird ready for the smoker.
Dry Brine the Turkey
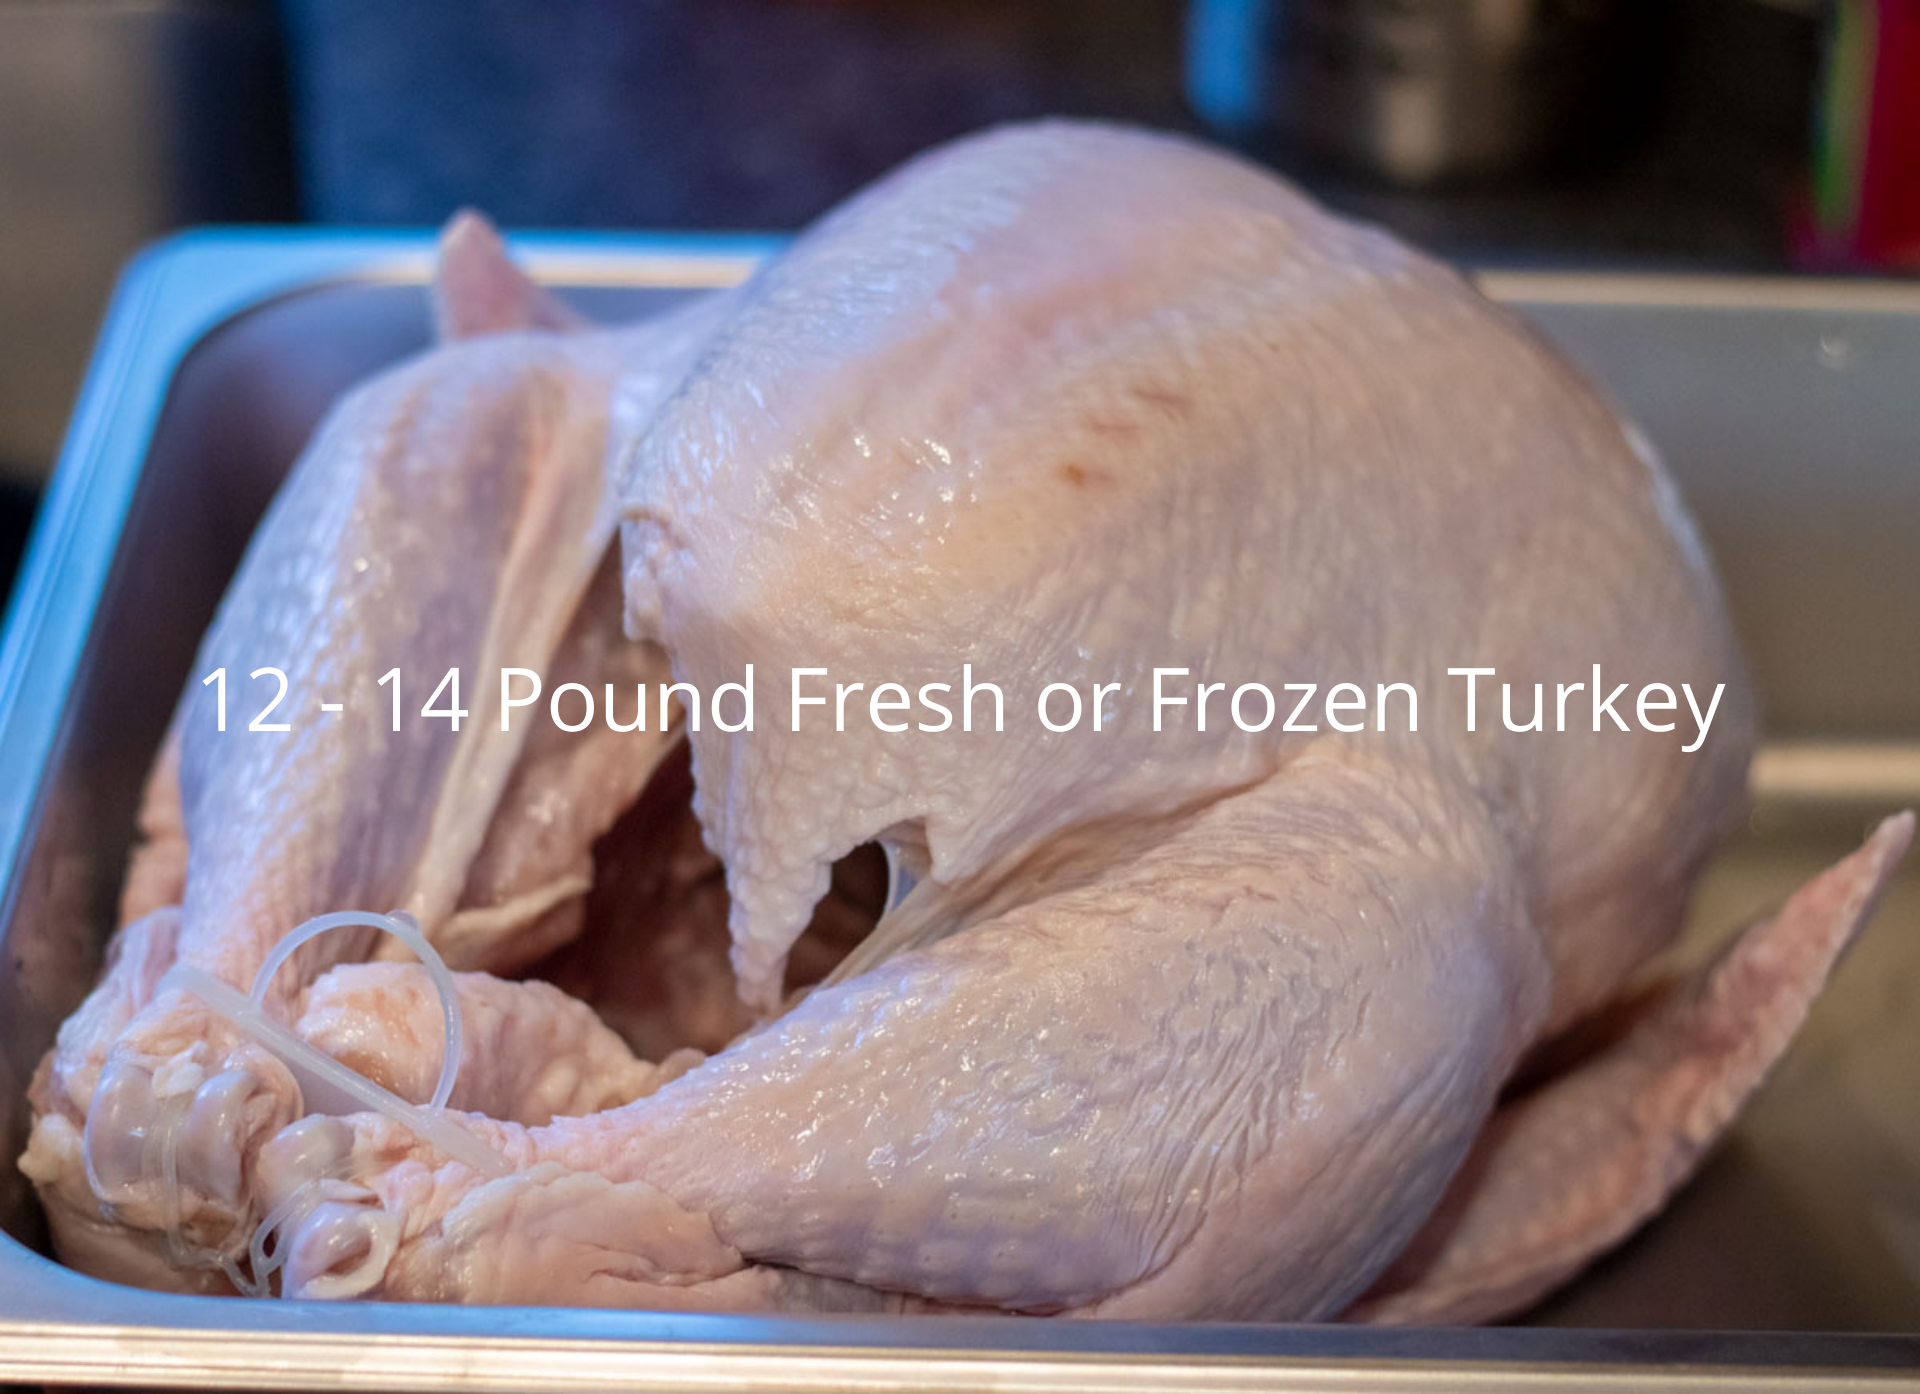
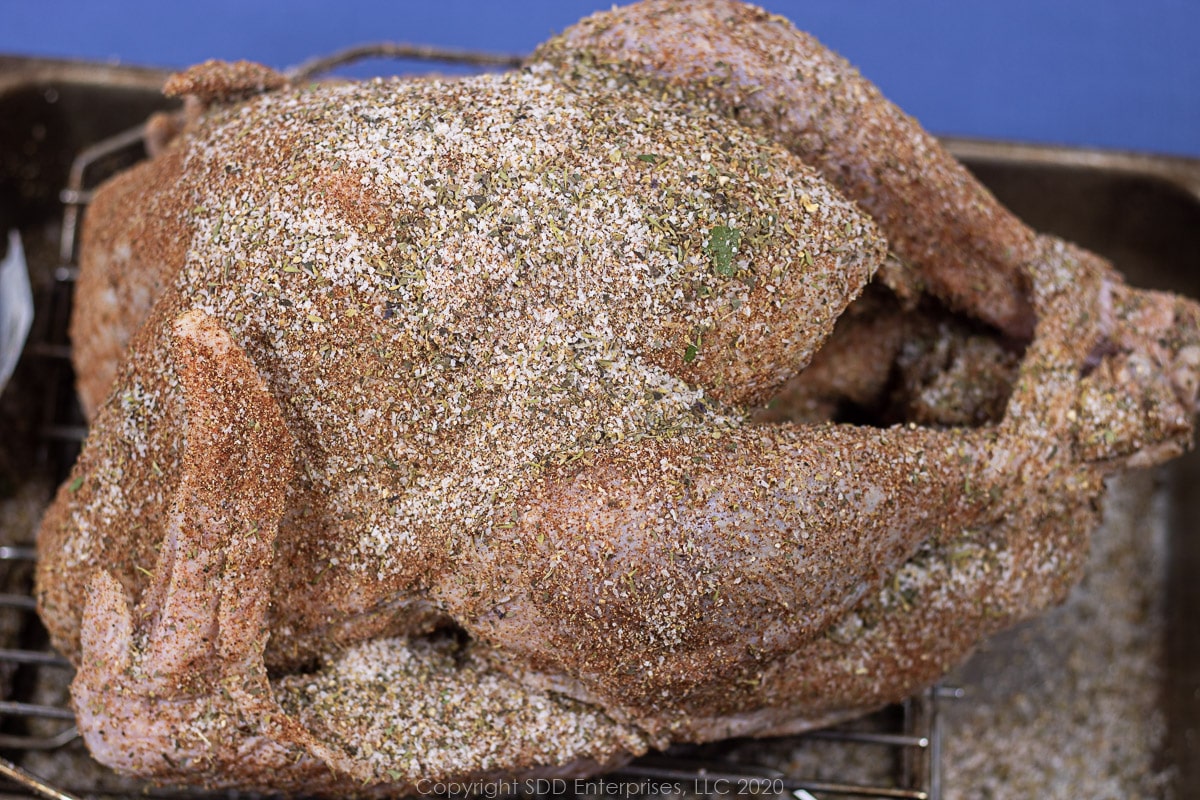
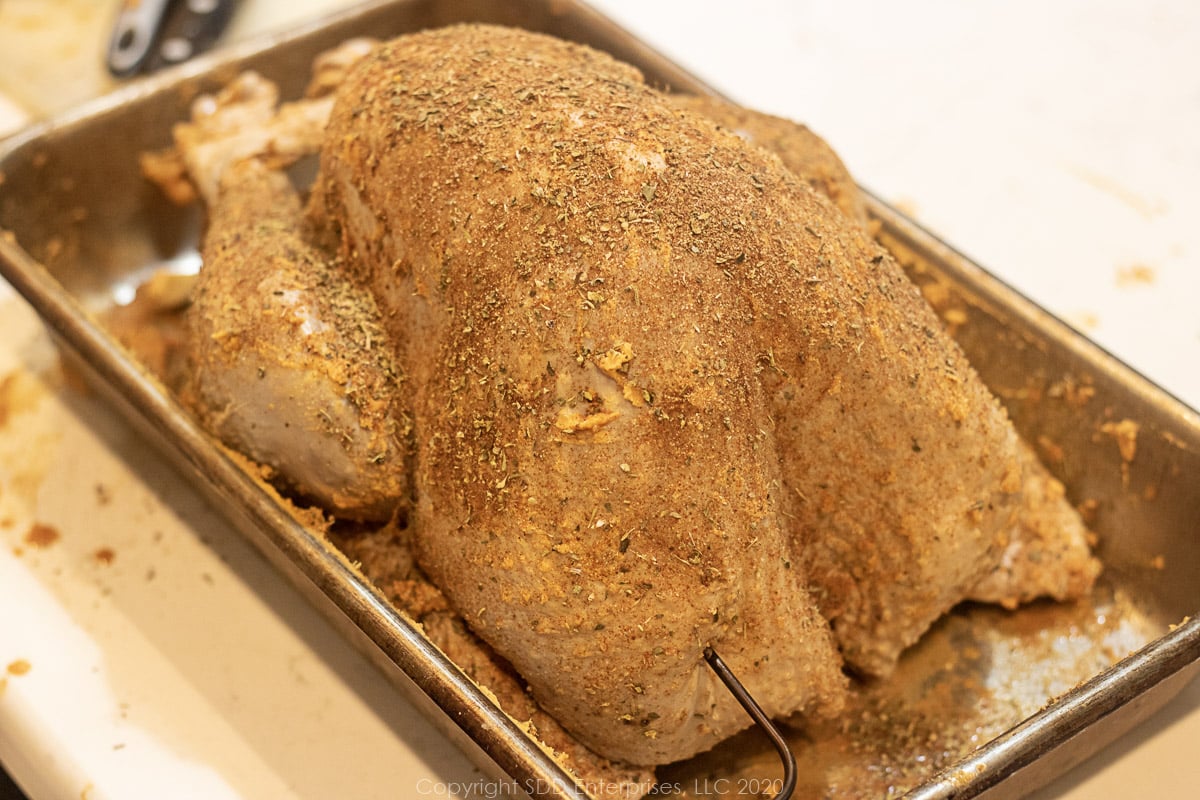
Remove the neck and giblets from the cavity and set them aside for a stock (these can be frozen if you're not going to use them for a while). Rinse the entire bird, inside and out under cold water, then pat dry with a clean kitchen towel or some paper towels. Place generous amounts of the Dry Brine in the cavity and all over the outside of the turkey, making sure to get into every nook and cranny. Place the turkey on a rack on a baking sheet (you want something to catch the juice which will be generated during the brine). You can place the turkey in a Brining Bag, or make a loose tent of wax paper. Let the brining turkey sit in the fridge for about 12 to 14 hours or about 1 hour per pound.
Naked Rest
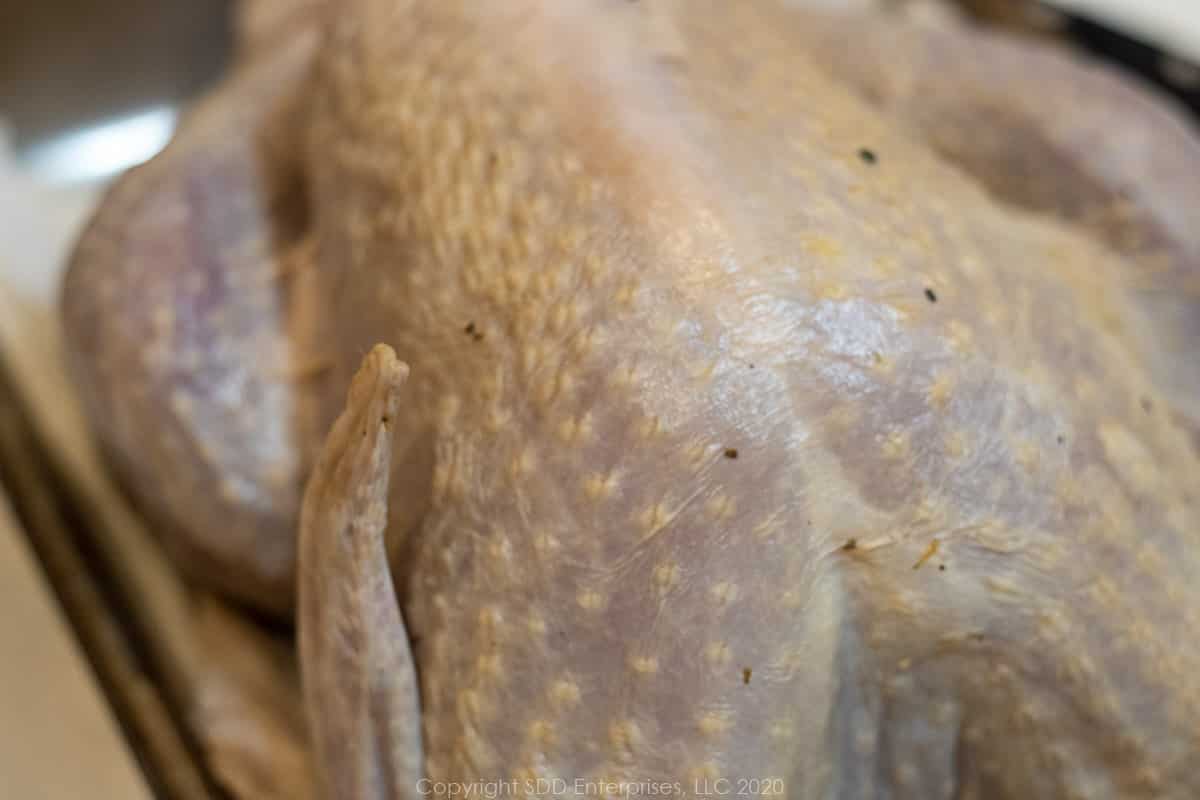
OK, clothing is optional for this part. When the Dry Brine period is over, remove the turkey from the fridge and carefully rinse off the dry brine under cold water. Make sure to get inside the cavity and in all the nooks and crannies. Thoroughly dry the turkey with paper towels both inside and out. Place the bird on a prep tray and return it to the fridge uncovered for 4 to 5 hours. The surface of the skin will dry and become somewhat translucent.
Wet Rub/Inject
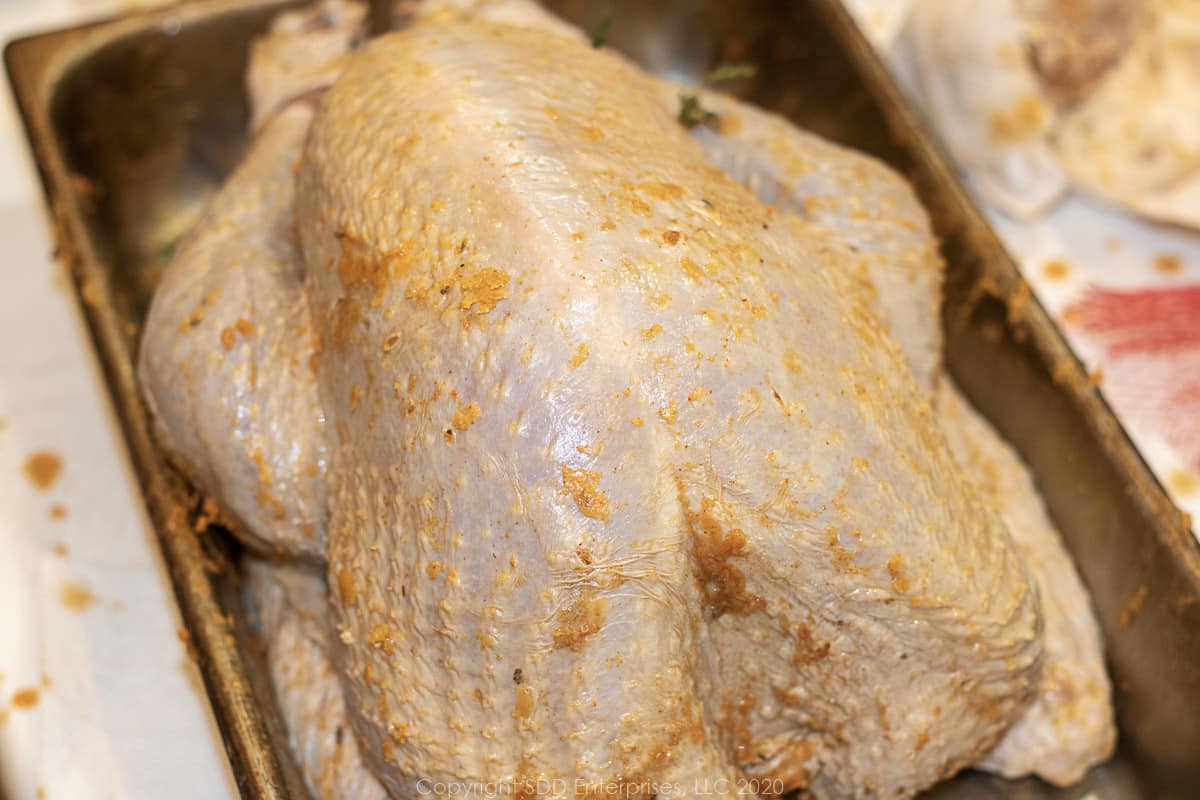
Injecting is optional; the mixture can also be spread over the turkey and rubbed in with your hands. About 10 minutes before the end of the naked rest, strain the lemon juice to remove the seeds and most of the pulp, melt the butter then add all the ingredients together and stir to dissolve. If injecting, make sure your needle has a large enough orifice to handle the dry ingredients. The cayenne and white pepper should be very fine (and mostly dissolved) so they will pass through the needle without problems. Inject about half of the solution into various thick parts of the breast, thighs and legs. There are no magic spots to inject, just try to evenly distribute the injections with a few pretty deep and a few not so deep. Pour the remaining wet rub over the turkey and rub it all over the bird with your hands. Loosen the skin and rub some butter mixture under the skin and rub a little in the cavity.
Prepare the cavity
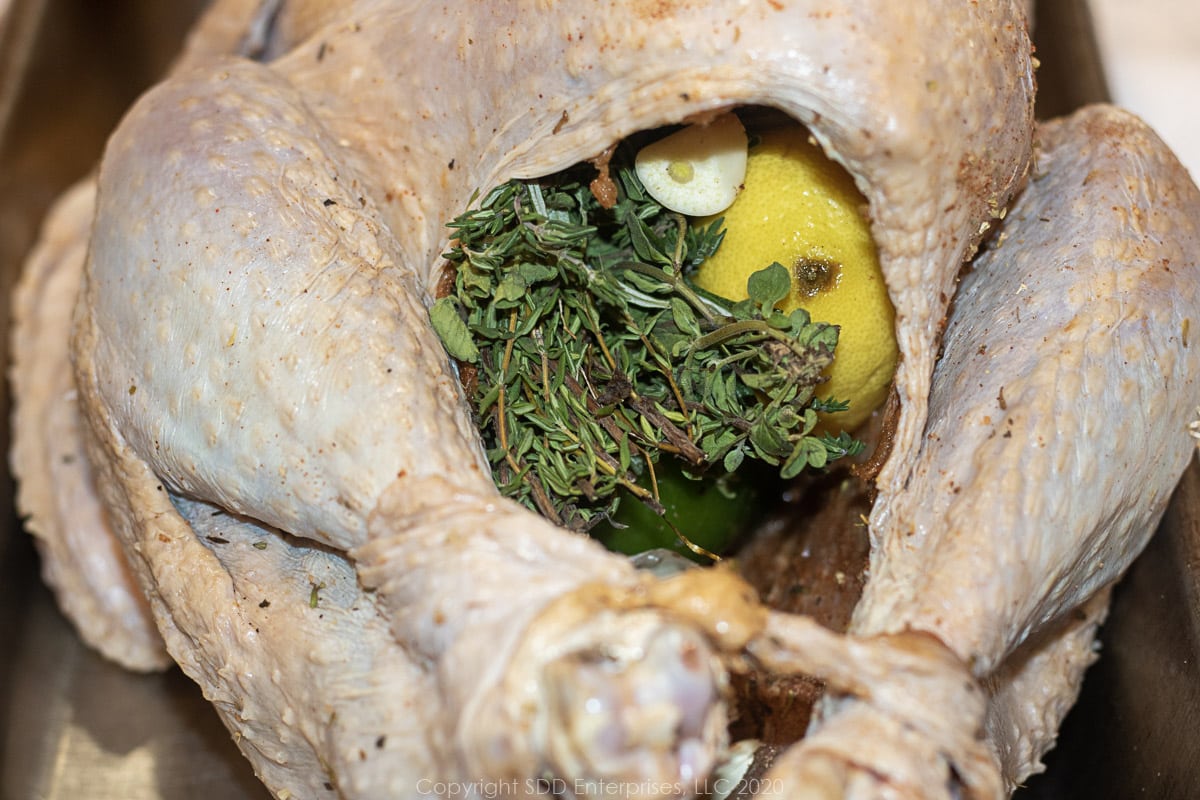
After getting the buttery rub all over everything, sprinkle some black ground pepper and some of the Dry Rub inside the cavity. Slice the onion, garlic, celery, apple, orange and lemon (or whatever combination you choose). Stuff those along with the herb bundle inside the cavity, trying to fill every bit of the void.
Apply the Dry Rub
With the cavity full, place the turkey on the prep board, breast side up. Sprinkle the Dry Rub all over the outside of the turkey and rub it in with your hands. The buttery wet rub will facilitate this process. Insert the thermometer probe (this is how to do that) and let the rubbed bird sit out while you get the smoker ready. The closer to room temperature the better.
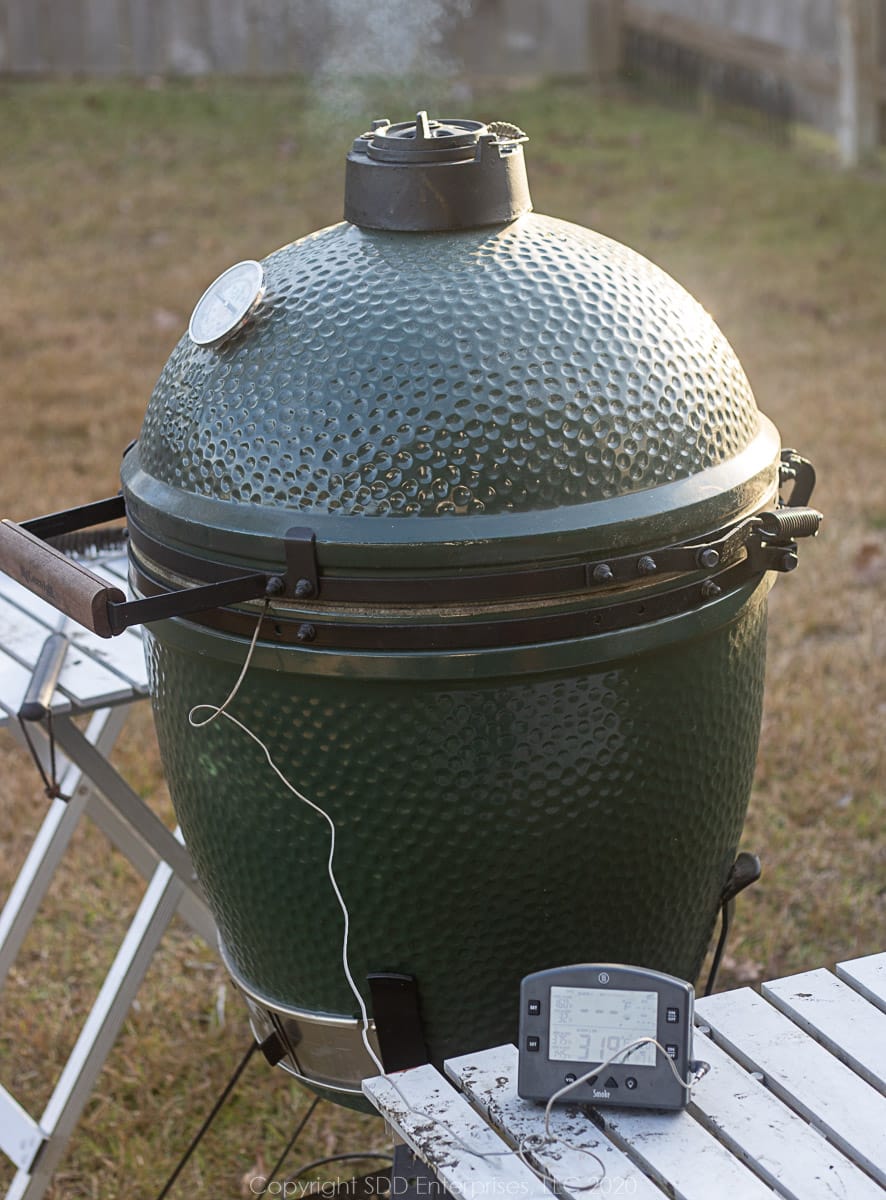
Prepare the smoker
Every smoker is a little different and you should prepare it as you normally do. I like to place an aluminum pan under the grate to catch juices that can flavor the gravy. This is not low and slow, so set up your smoker for a temperature of 325 degrees Fahrenheit with your choice of smoke wood. Depending upon how long it takes your smoker to come up to temperature, you can start anytime after the naked rest.
Place the Turkey on the smoker
Place the turkey on the smoker when it's ready. Ideally, set it right on the grate, but you can set it in an aluminum pan or place one under the grate to catch the juices.
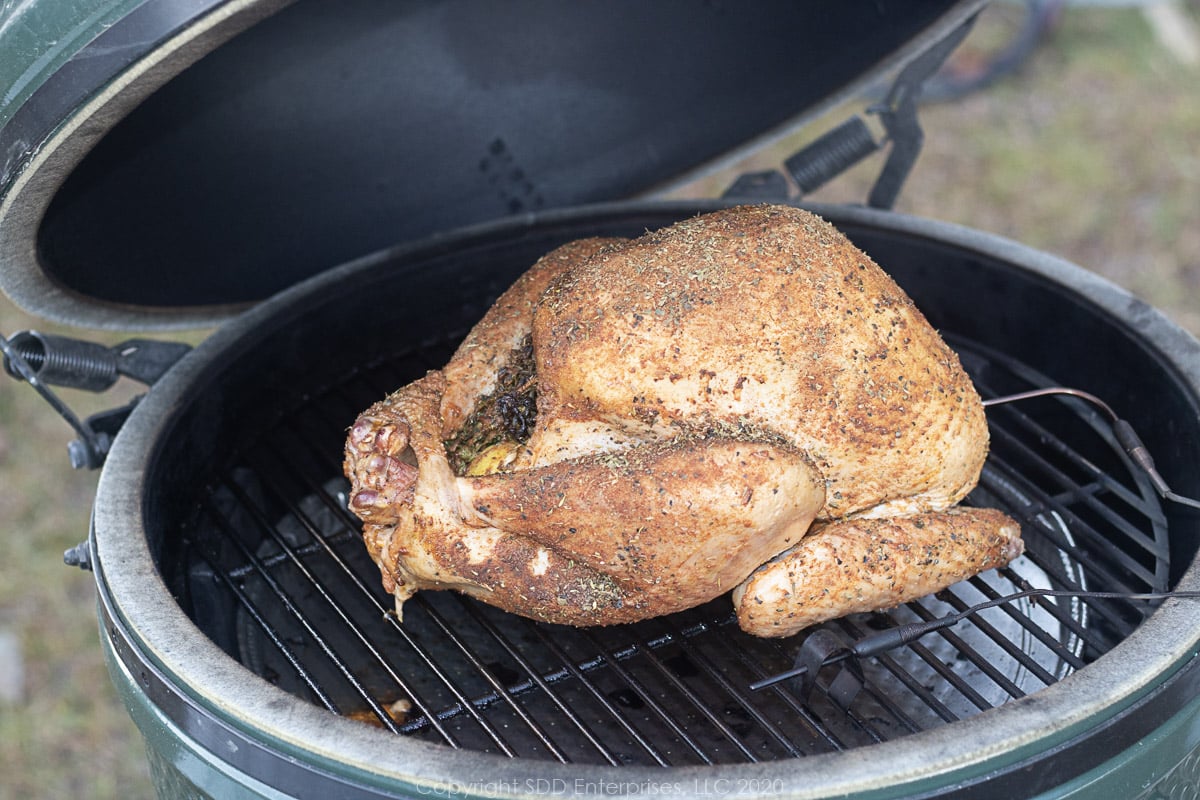
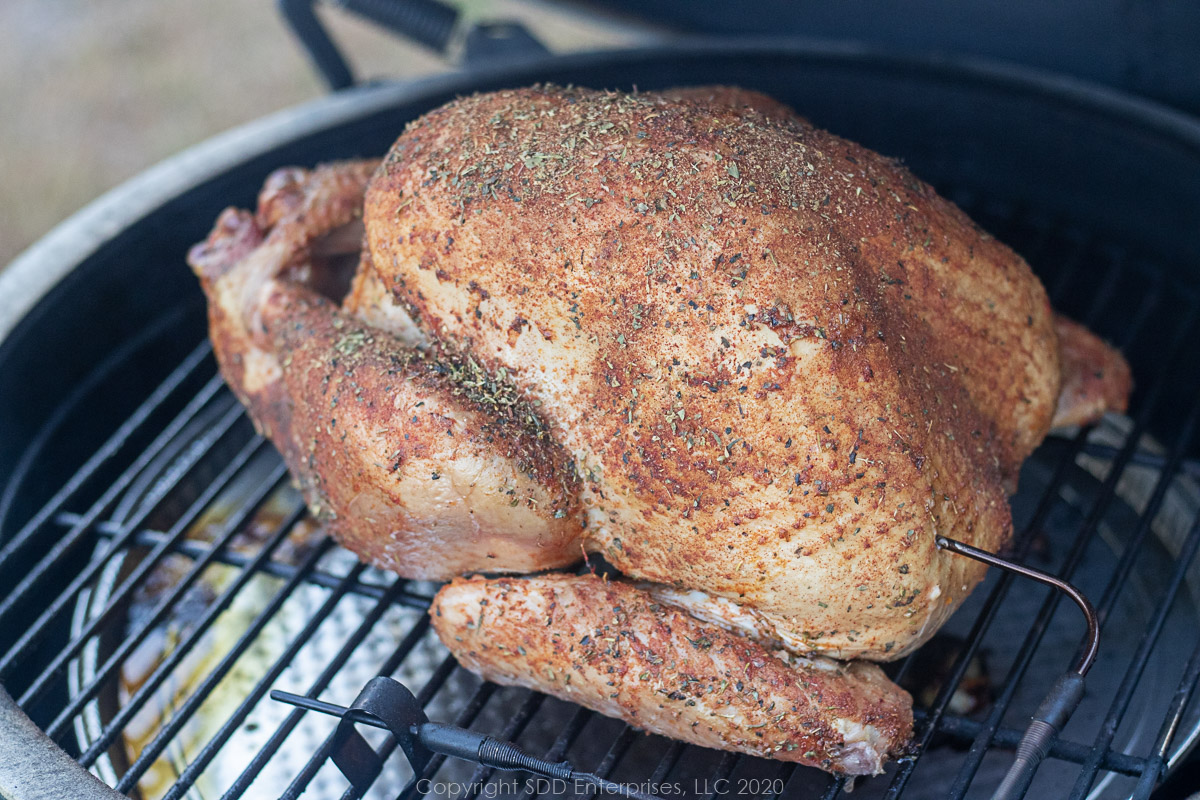
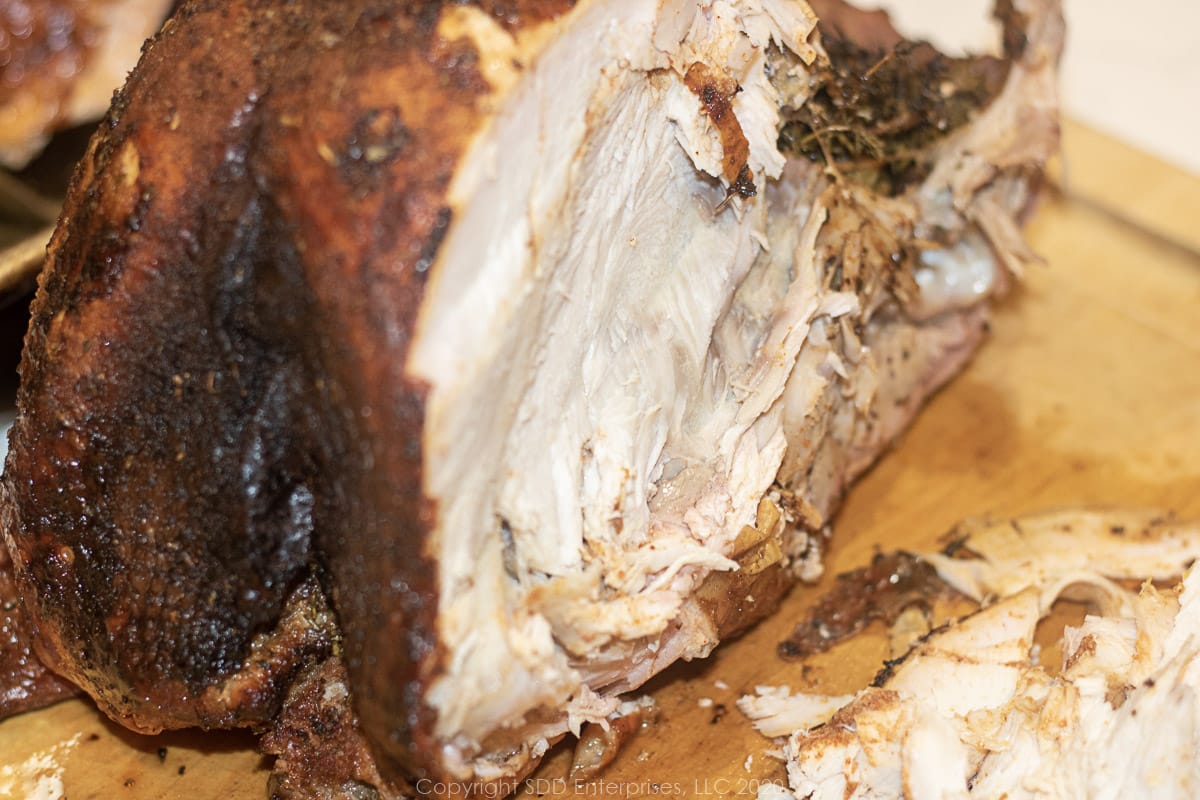
Adjust the vents to maintain 325 degrees Fahrenheit. Smoking time should be about 15 minutes per pound, but use this only as a guide. I do not recommend cooking by time. The turkey is only done when the breast reaches an internal temperature of 170 degrees Fahrenheit degrees and the thighs reach 180 degrees Fahrenheit. Read about tracking the time and temperature in the Hints and Tips section below. As a guide, it should take a little over 3 hours, but try not to lift the lid very often. When the bird is about 5 degrees under your desired target temperature, remove the turkey from the smoker, tent loosely with aluminum foil and set it aside to rest. Carryover heat will continue to cook the turkey so it will reach the desired finished temperature. Here's a short interesting article about carryover cooking if you want a full understanding. It may be the difference between perfectly cooked meat and a hockey puck!
Hints and Tips
That's always a tough question to answer. You want to make sure everyone gets all the turkey they want and you certainly want leftovers. Like so many other turkey-related questions, I always turn to the experts for guidance. Check out what Butterball has to say about choosing the right turkey for you right here.
Yes, the smoking process (even at the higher 325 degrees Fahrenheit) needs the bird to be thawed to end up with a properly cooked bird. Check out what Butterball has to say about that.
We will run the smoker at 325 degrees Fahrenheit which is warmer than a normal low and slow range. A rule of thumb is that it will take between 15 and 20 minutes per pound, but do not rely on that. The turkey is done when the thighs are 180 degrees and the breasts are 170 degrees. Here is a short blurb from Butterball about doneness.
Use reliable thermometers to track the progress of the cook. I recommend using two thermometers. One is a leave-in thermometer and the other is an instant-read thermometer, The leave-in thermometer tracks the temperature at one spot in the turkey and the instant-read thermometer will verify the temperature at various locations. I can highly recommend ThermoWorks products. I am an affiliate of ThermWorks and will earn a small commission if you purchase a ThermoWorks product through my links, but most importantly, these are the tools I have been using for years.
You will get better at this with experience. Make sure to probe thick parts of the meat, deep enough that you get an idea of what's going on below the surface but not against a bone. Here's an excellent article from Thermoworks about how to do this and a short video from Butterball on probing for temperature.
No, you can roast or smoke your turkey without brining. Brining helps with flavor and moisture and will result in a better-tasting bird. At a minimum, make sure to salt your turkey at least an hour before hitting the smoker.
No, you can skip or shorten that step if you want. What this step does is promote a crispier skin on the turkey by reducing the surface moisture which could have the tendency to steam while smoking. Don't let the naked part scare you, that's totally optional.
The answer is that you should use your favorite flavor. Turkey naturally has a mild flavor but easily adopts flavor influences from brine, spices and smoke. Some of my favorites for turkey are hickory, pecan or cherry or a combination of these.
No, we want the smoke to embrace the turkey. It will gradually become golden brown or mahogany in color and look pretty dark. You do want to keep an eye on the wings and wrap the tips with aluminum foil if they look like they may be charring. Tip: bend the wing under the turkey so the tips are not sticking out.
Leftover turkey will be fine for 3 to 4 days in the fridge and 2 to 3 months in the freezer. Leftovers are the perfect lagniappe from a holiday celebration. Make sure you get to them before Uncle Stinky eats them all. Leftovers are better if they are not dried out, so the key is storing is an airtight wrap or container. Another way to help maintain the quality is to store the turkey in as large of pieces as possible, then just slice it when you want to eat it.
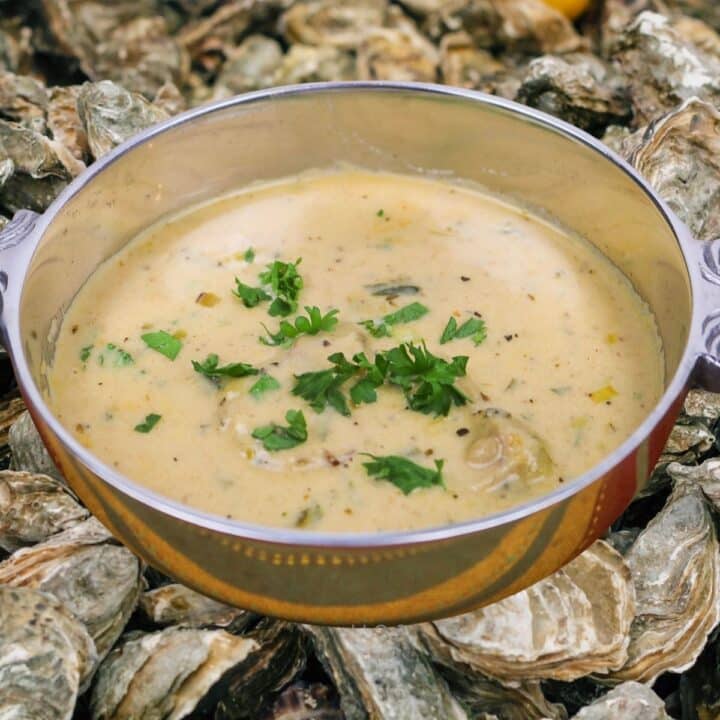
This is a perfect opportunity to use the carcass to make a nice turkey stock that can be used for Turkey and Oyster Gumbo or many other dishes.
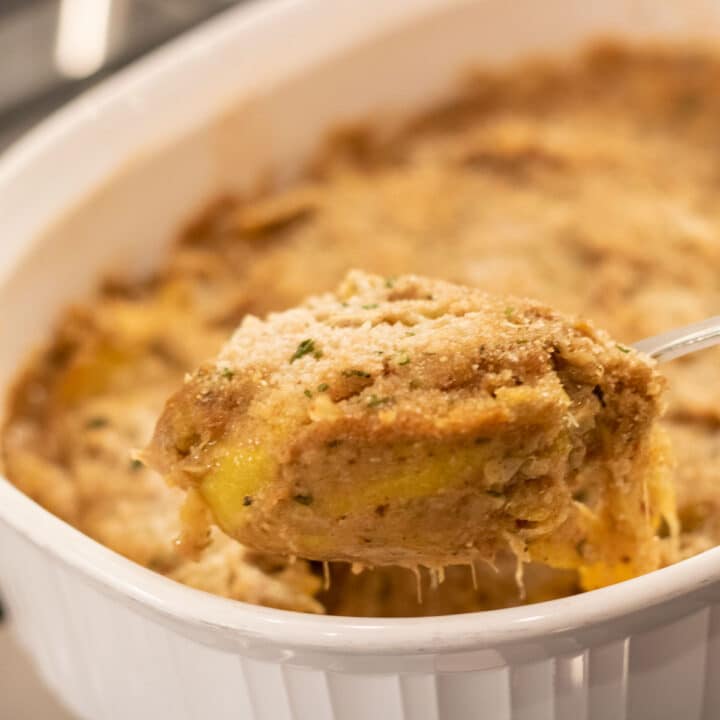
Here are some other ways to prepare your Holiday Turkey:
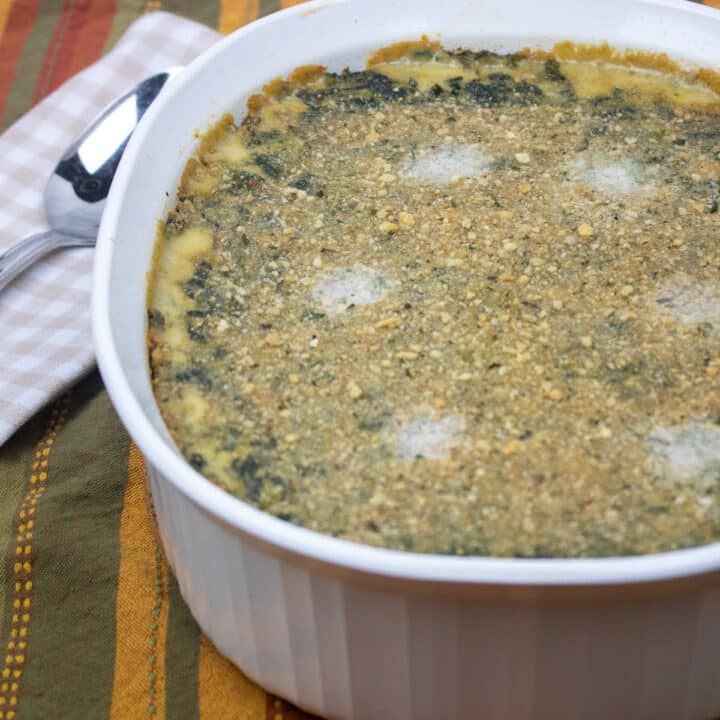
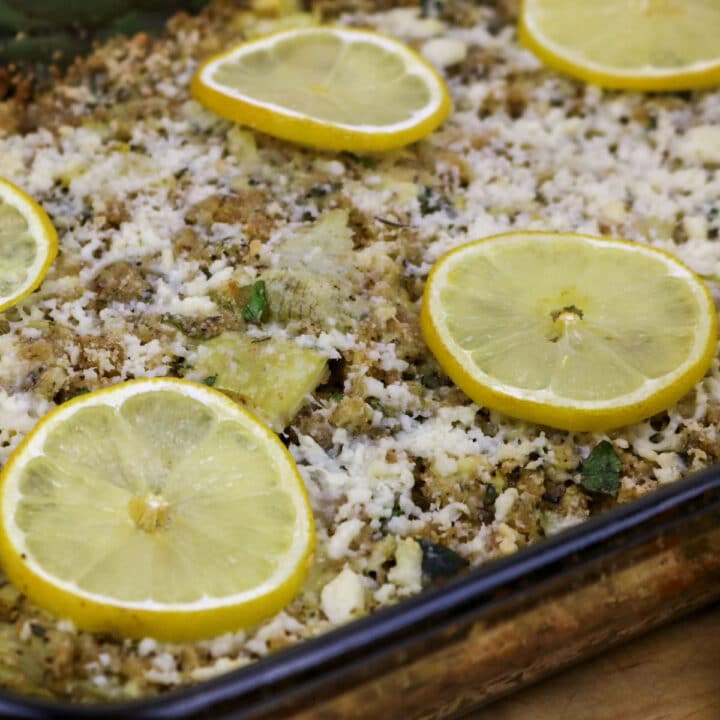
What will you serve with your Smoked Turkey? Check out these suggestions for Thanksgiving and Holiday fare from Sweet Daddy D:

If you make this recipe:
- Tell us about it in the Comments section below
- LEAVE A RATING ON THE RECIPE-worthy of 5-Stars?
- Questions or Comments? that's the place!
- SIGN UP FOR OUR EMAIL UPDATES so you don't miss anything!
- Post a picture and share it with your friends on our Social Media:
Yeah You Right!
Recipe
Smoked Turkey
Here's What You Need
- 12 to 14 pound Turkey see Notes
Dry Brine
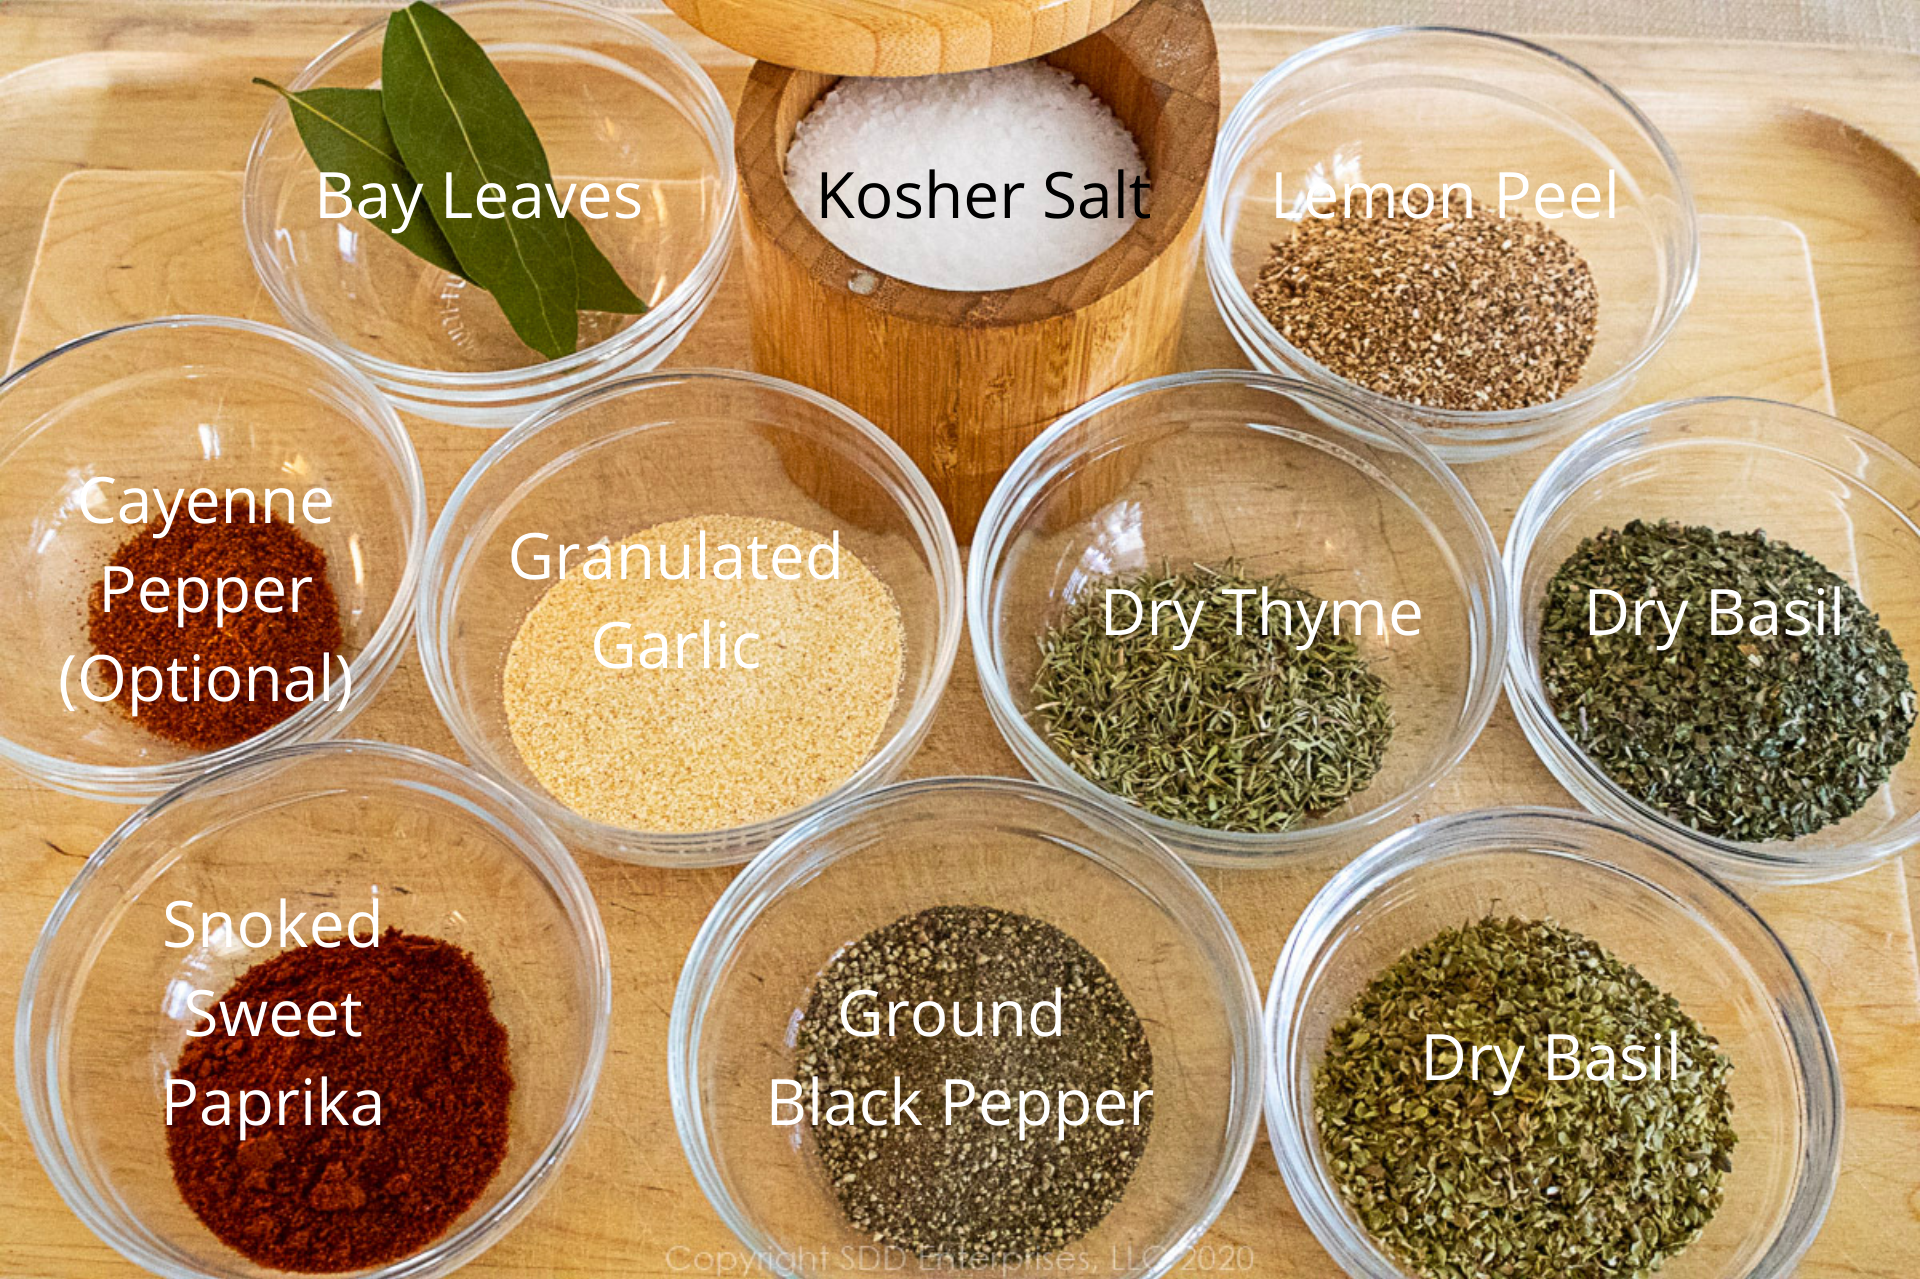
- ½ cup kosher salt
- 2 tablespoon lemon peel
- 2 tablespoon dried oregano
- 2 tablespoons dried basil
- 1 tablespoon dried thyme
- 1 tablespoon ground black pepper
- 2 tablespoons granulated garlic
- 1 tablespoon sweet smoked paprika
- 2 bay leaves broken
- 1 teaspoon cayenne pepper optional
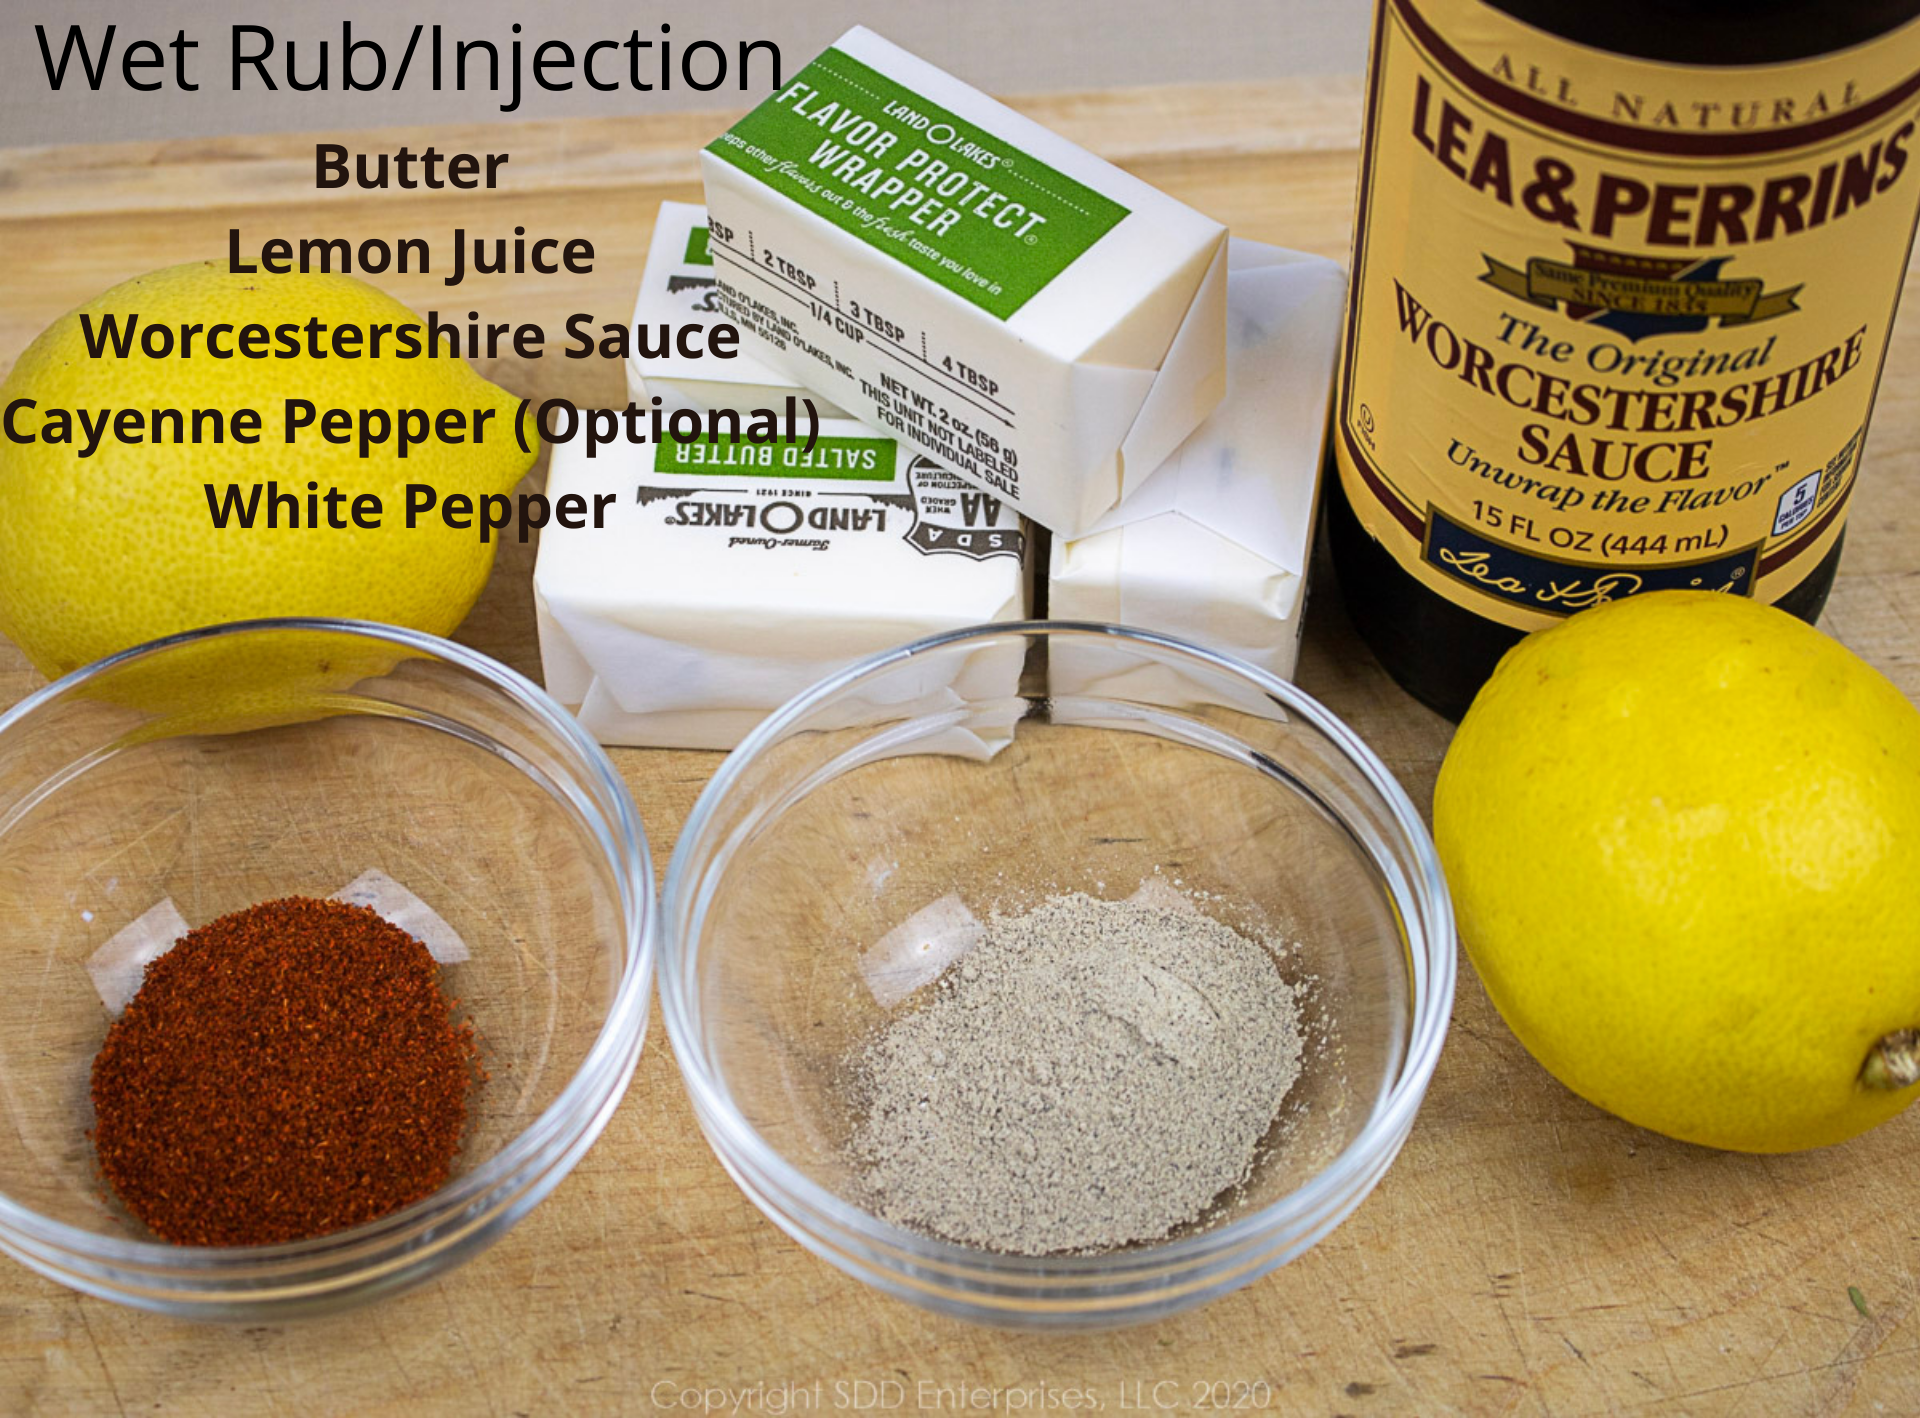
Injection and wet rub - See Notes
- 1 cup butter
- ¼ cup Worcestershire sauce
- 1 cup lemon juice strained
- 1 teaspoon cayenne
- 1 teaspoon white pepper
Dry Rub
- 1 tablespoon sweet smoked paprika
- 1 tablespoon dried oregano
- 1 tablespoon dried basil
- 1 tablespoon dried marjoram
- 1 tablespoon granulated garlic
- 1 tablespoon onion powder
- 1 teaspoon dry thyme
- 1 teaspoon celery seed
For the Cavity - See Notes
- 1 medium Yellow Onions
- 1 stalk Celery
- 1 head Garlic
- 1 small Apple
- 1 small orange
- 1 small Lemon
- 4 sprigs Parsley
- 1 bunch Fresh Herbs See Notes
Here's What You Do
To Brine:
- Remove the neck and giblets from the turkey and set aside for another use.
- Trim any excessive loose skin around the cavities. Completely rinse the turkey inside and out with cold water and pat dry with a kitchen towel or paper towels. Make sure to thoroughly dry the cavities and all the nooks and crannies.
- Combine all the ingredients for the Dry Brine. Apply ample amounts of the Dry Brine inside the cavity and outside of the bird. Place the turkey on a rack on a baking sheet (something to catch the juice), or inside a Brining Bag and place in the refrigerator for 12 to 14 hours (1 hour per pound).
- Remove the brined bird from the fridge and thoroughly rinse off the brine under cold water.
Naked Rest:
- Pat the brined turkey dry with a kitchen towel or paper towels inside and out.
- Set the turkey back into the fridge, uncovered. for at least 4 hours, longer if possible while the skin dries.
Final Seasoning and Prep:
- Combine the ingredients for the Dry Rub.
- Remove the turkey from the fridge. Sprinkle the cavity with ground black pepper and some of the Dry Rub.
- Melt the butter for the injection/wet rub and mix all the wet rub ingredients; stir to dissolve. Inject the butter mixture into 5 or 6 spots in the thick parts of the turkey, then pour the remaining wet rub over the bird and spread thoroughly with your hands. Make sure to rub some under the skin and catch all the nooks and crannies.
- Cut the ingredients to stuff the cavity into manageable sizes. Make a bouquet garni (See Notes) with the fresh herbs. Place all of these in the cavity and push to make a tight fit.
- Bend the wing tips back under the wings. If there is a flap of skin that you can stitch the legs in, do so. If not, tie the legs together with butcher twine.
- Apply a generous amount of Dry Rub all over the turkey, making sure to catch all the nooks and crannies and get some under the skin. Insert the temperature probe (see Notes). Place the turkey on a prep board and set aside while the smoker is prepared.
On the smoker:
- Prepare your smoker for 325 degrees Fahrenheit with your favorite smoke wood.
- (to catch the drippings) When the smoker is ready, place the turkey on the grate. Depending on your smoker, place an aluminum pan under the grate, or you could place the turkey in an aluminum pan to catch the drippings. Do not cover. Monitor the internal temperature as it smokes, but resist the temptation to open the lid often.
- Once the thermometer shows about 155 to 160 degrees IT in the breast, start checking the temperature with your instant-read thermometer in a number of places of white and dark meat. See Notes about how to do this.
- Once the IT has been verified at 170 degrees in the thigh and 160 in the breast, remove the turkey from the smoker, cover loosely with an aluminum foil tent and allow it to rest. Maintain the thermometer probe in the breast to monitor carryover cooking.
Comments
No Comments